Things You Will Need[]
- 1 1/2 cups plus 1/2 cup water
- 2 1/2 cups plus 1 cup sugar
- 1/2 oz. gelatin
- 1/2 tsp. salt
- 1 cup juice of your desired flavor
- Cornstarch
- Vegetable oil
- Jelly bean pans (molds) or cookie sheets
- Saucepan
- Stainless steel pot with lid
- Wooden spoon
- Cooking thermometer
Instructions[]
- In a medium to large saucepan combine 1 1/2 cups of water, 2 1/2 cups of sugar, and 1/2 ounce of powdered gelatin. The saucepan should have a heavy bottom and straight sides to prevent boiling over. Gelatin is the thickener and will help the water and sugar form into a thick syrup. Cook over medium heat and stir continuously using a long handled wooden spoon. Let the mixture slowly come to a boil.
- As you continue to stir, periodically check the temperature with a cooking thermometer. As soon as the temperature reaches 230 degrees F, take the pan off the burner. This should not take more than 25 minutes. If your syrup gets any hotter than 230 degrees, it will make your jelly beans too hard. Set the pan in a bowl of ice to stop the temperature from going up. (See References 1)
- Quickly stir in your flavor(s). This is the fun part, but it is best to start simple with fruit juices. Try orange, lemon, blueberry, or grape. Add 1 cup of desired juice plus 1/2 tsp. of salt. Depending on the juice, you may want to combine with lemon juice to add a bit of zip. Blueberry and orange are good flavors to add lemon juice to. In this case use 3/4 cup of juice and 1/4 cup of lemon. Freshly squeezed juice is great, but be sure to filter out any pulp. After stirring in flavor, let the syrup cool.

Jelly Beans in Molds
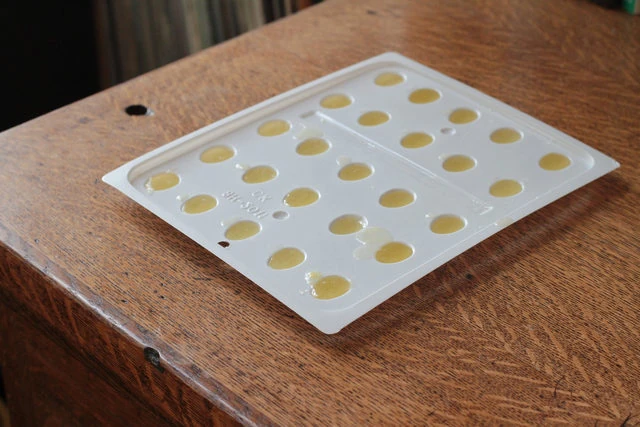
- Candy manufacturers use candy molds (pans with jelly bean shapes) in order to get evenly shaped candies. Jelly bean pans are affordable and can be ordered online. For this recipe you will need three or four. If you do not have jelly bean pans you can use cookie sheets. Lightly oil the jelly bean pans with vegetable oil and pour in your syrup. If you are using a cookie sheet you can make small, jelly-bean-size drops. Work quickly.
- Let the jelly beans sit for four to six hours, or until completely firm. Lay the jelly beans on sheets of wax paper and lightly dust them with cornstarch. If they are still a bit sticky, let them sit until they are dry. The cornstarch is intended to help dry them out. If they do not pop out of the molds right away, try putting them in the freezer for 10 minutes.
- The candies need to be coated so they will have an outer shell. The best way to do this is to use a candy-coating attachment on a kitchen mixer. These attachments can be expensive, so coating can also be done manually. Combine the jelly beans with a 1/2 cup of water and 1 cup of sugar in a stainless steel pot with a lid. You may also want to add food coloring. Gripping the sides of the pot so the lid is secure, hold it in front of you at a slight angle. Quickly move the pot in a circular motion so that the jelly beans are spinning and revolving around the interior edges of the pot. You are basically making a tumbler that allows the sugar to gradually build up and evenly coat the jelly beans. Do this until you do not see a lot of extra moisture left in the pan.
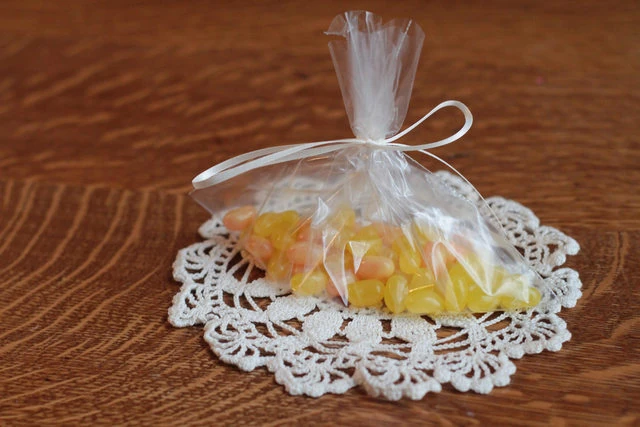
- Place the jelly beans on cookie sheets and place in the fridge for two to three hours or until the shells are completely dried and hardened. If the jelly beans are still not shiny enough for you, you can add a glaze using confectioners' sugar, water and food coloring (optional). For packaging, try dividing small amounts into small, clear plastic candy bags and tying them with colorful ribbons.